
Haunted House Village Cake

So, by now you know that I don’t like constructing a 3-D cookie house. They are just so much trouble and rarely stay up long enough to enjoy.
Which is why my new favorite thing to do instead is to turn the house cookies into a cake!
I did it last year for Christmas and loved the end result. So this year for Halloween, I stepped it up a notch and went all out decorating the houses, which you can see here.
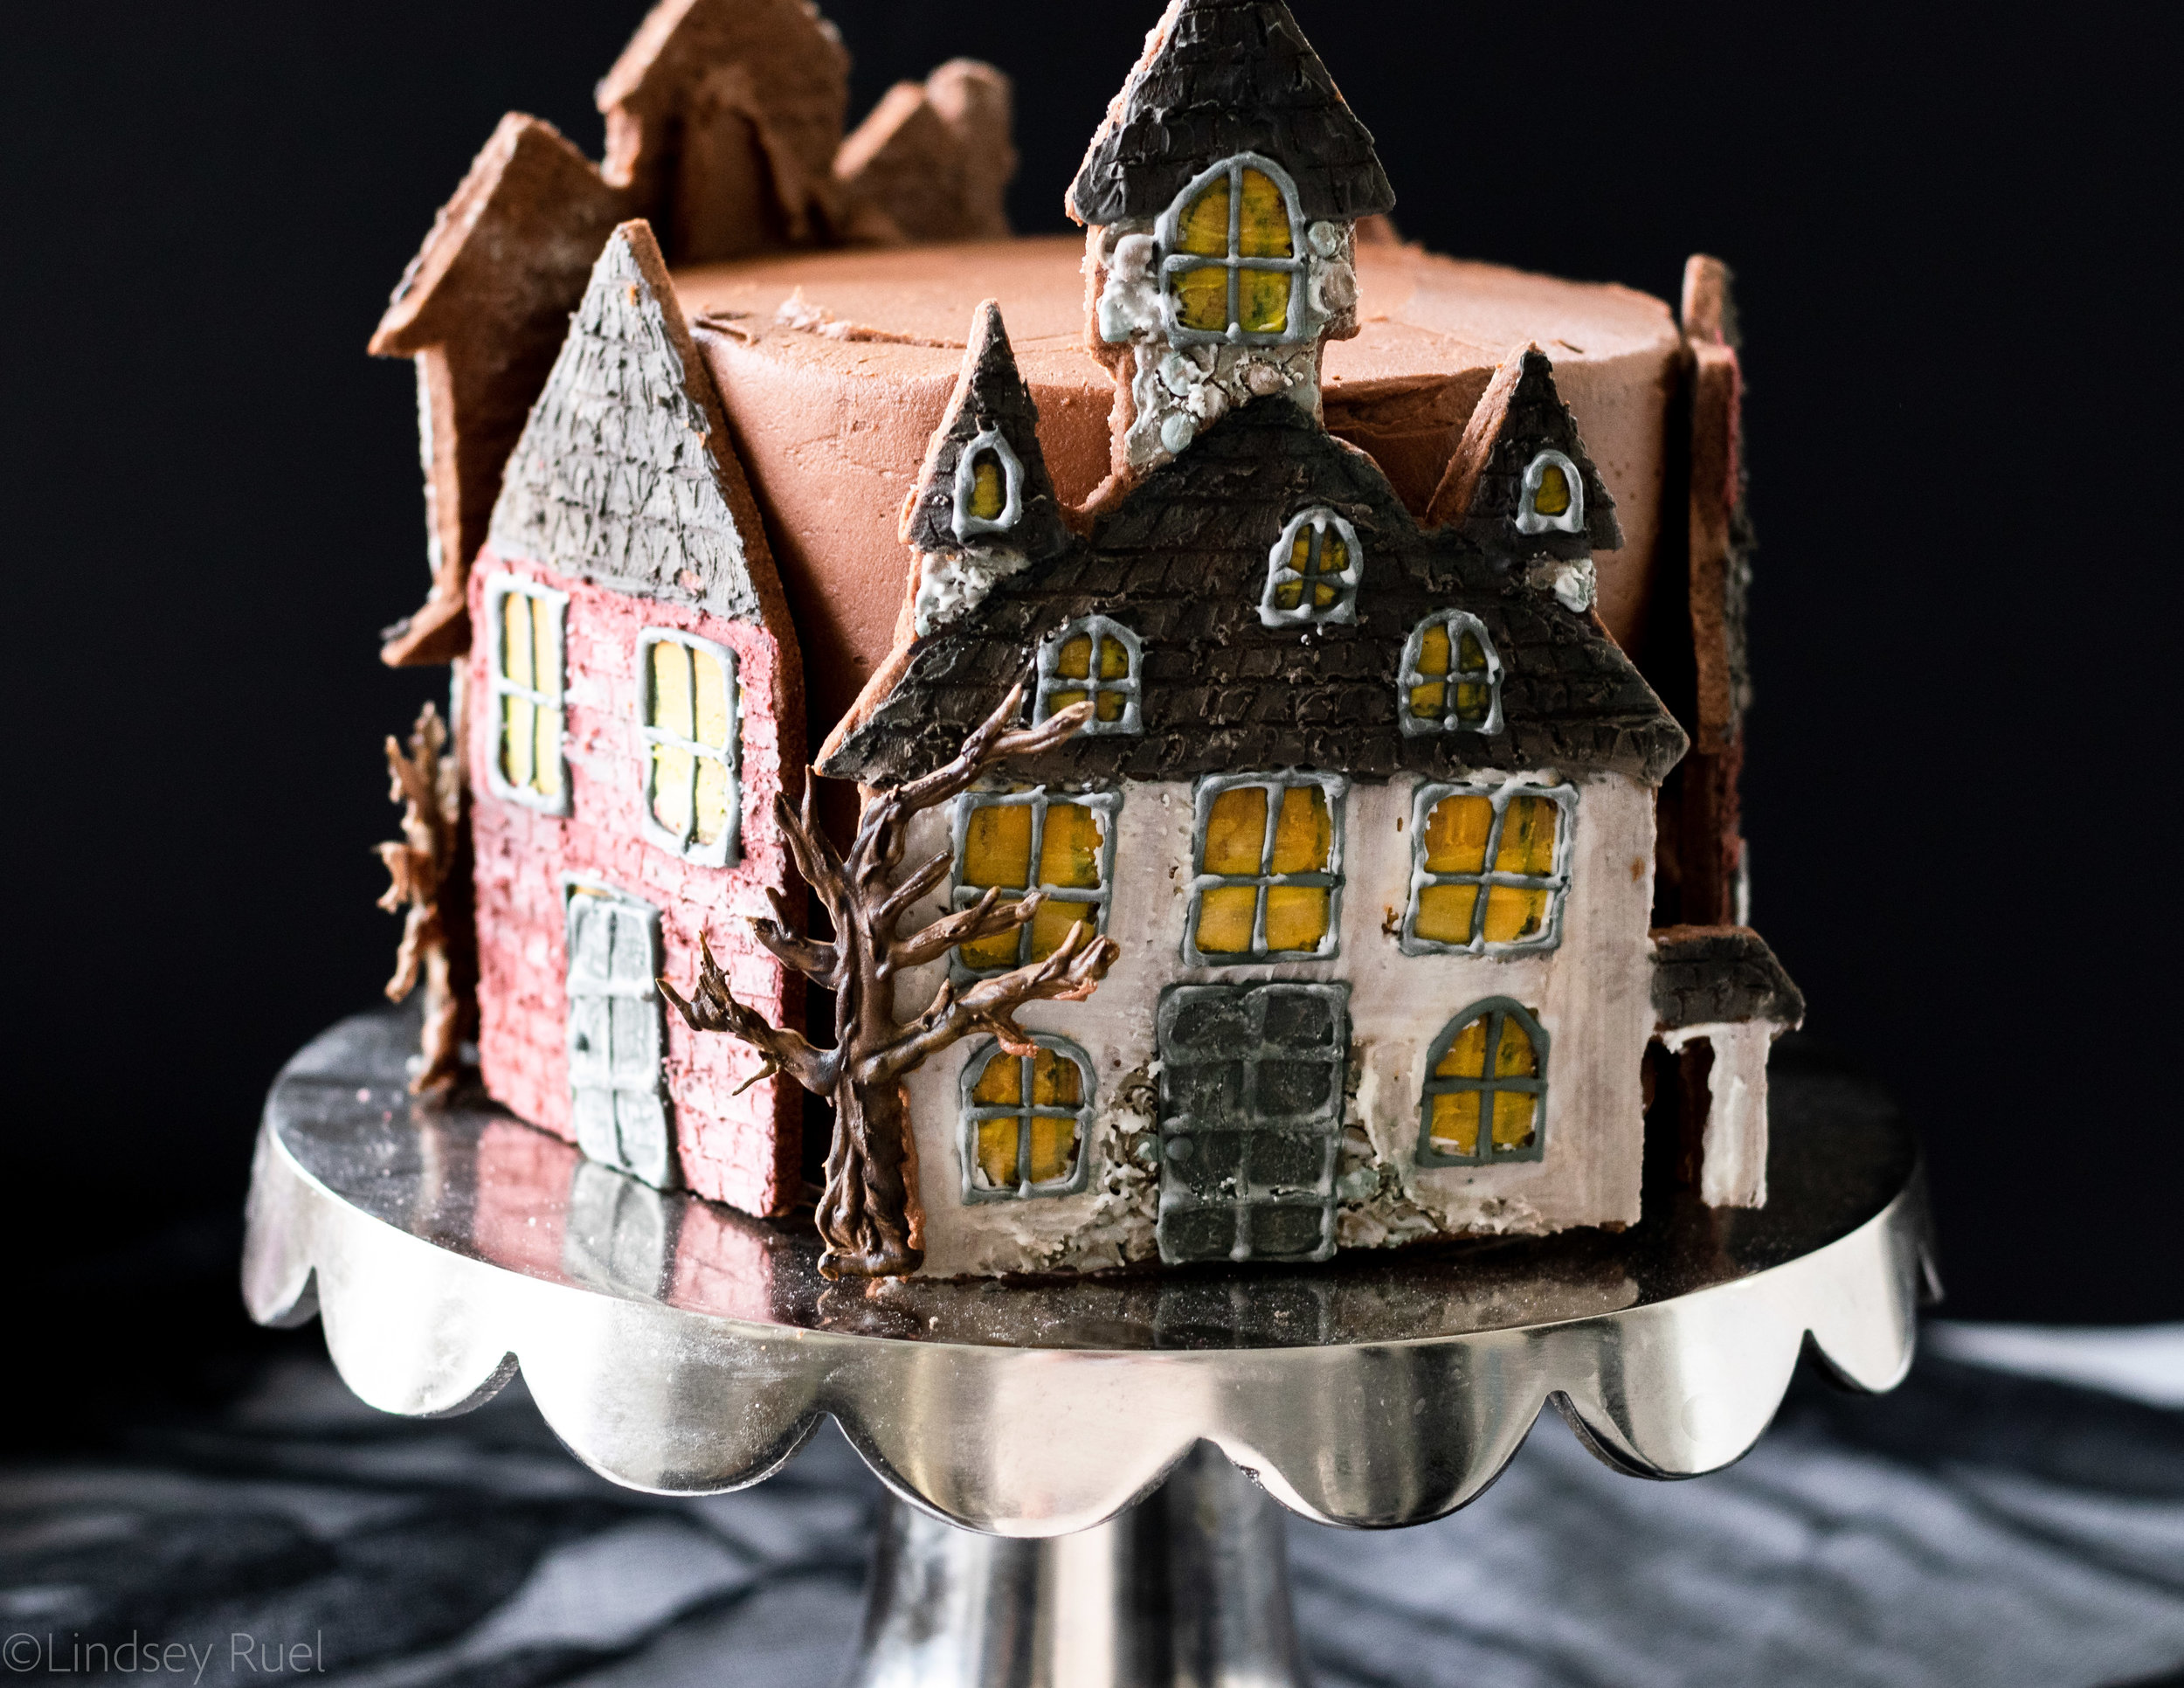
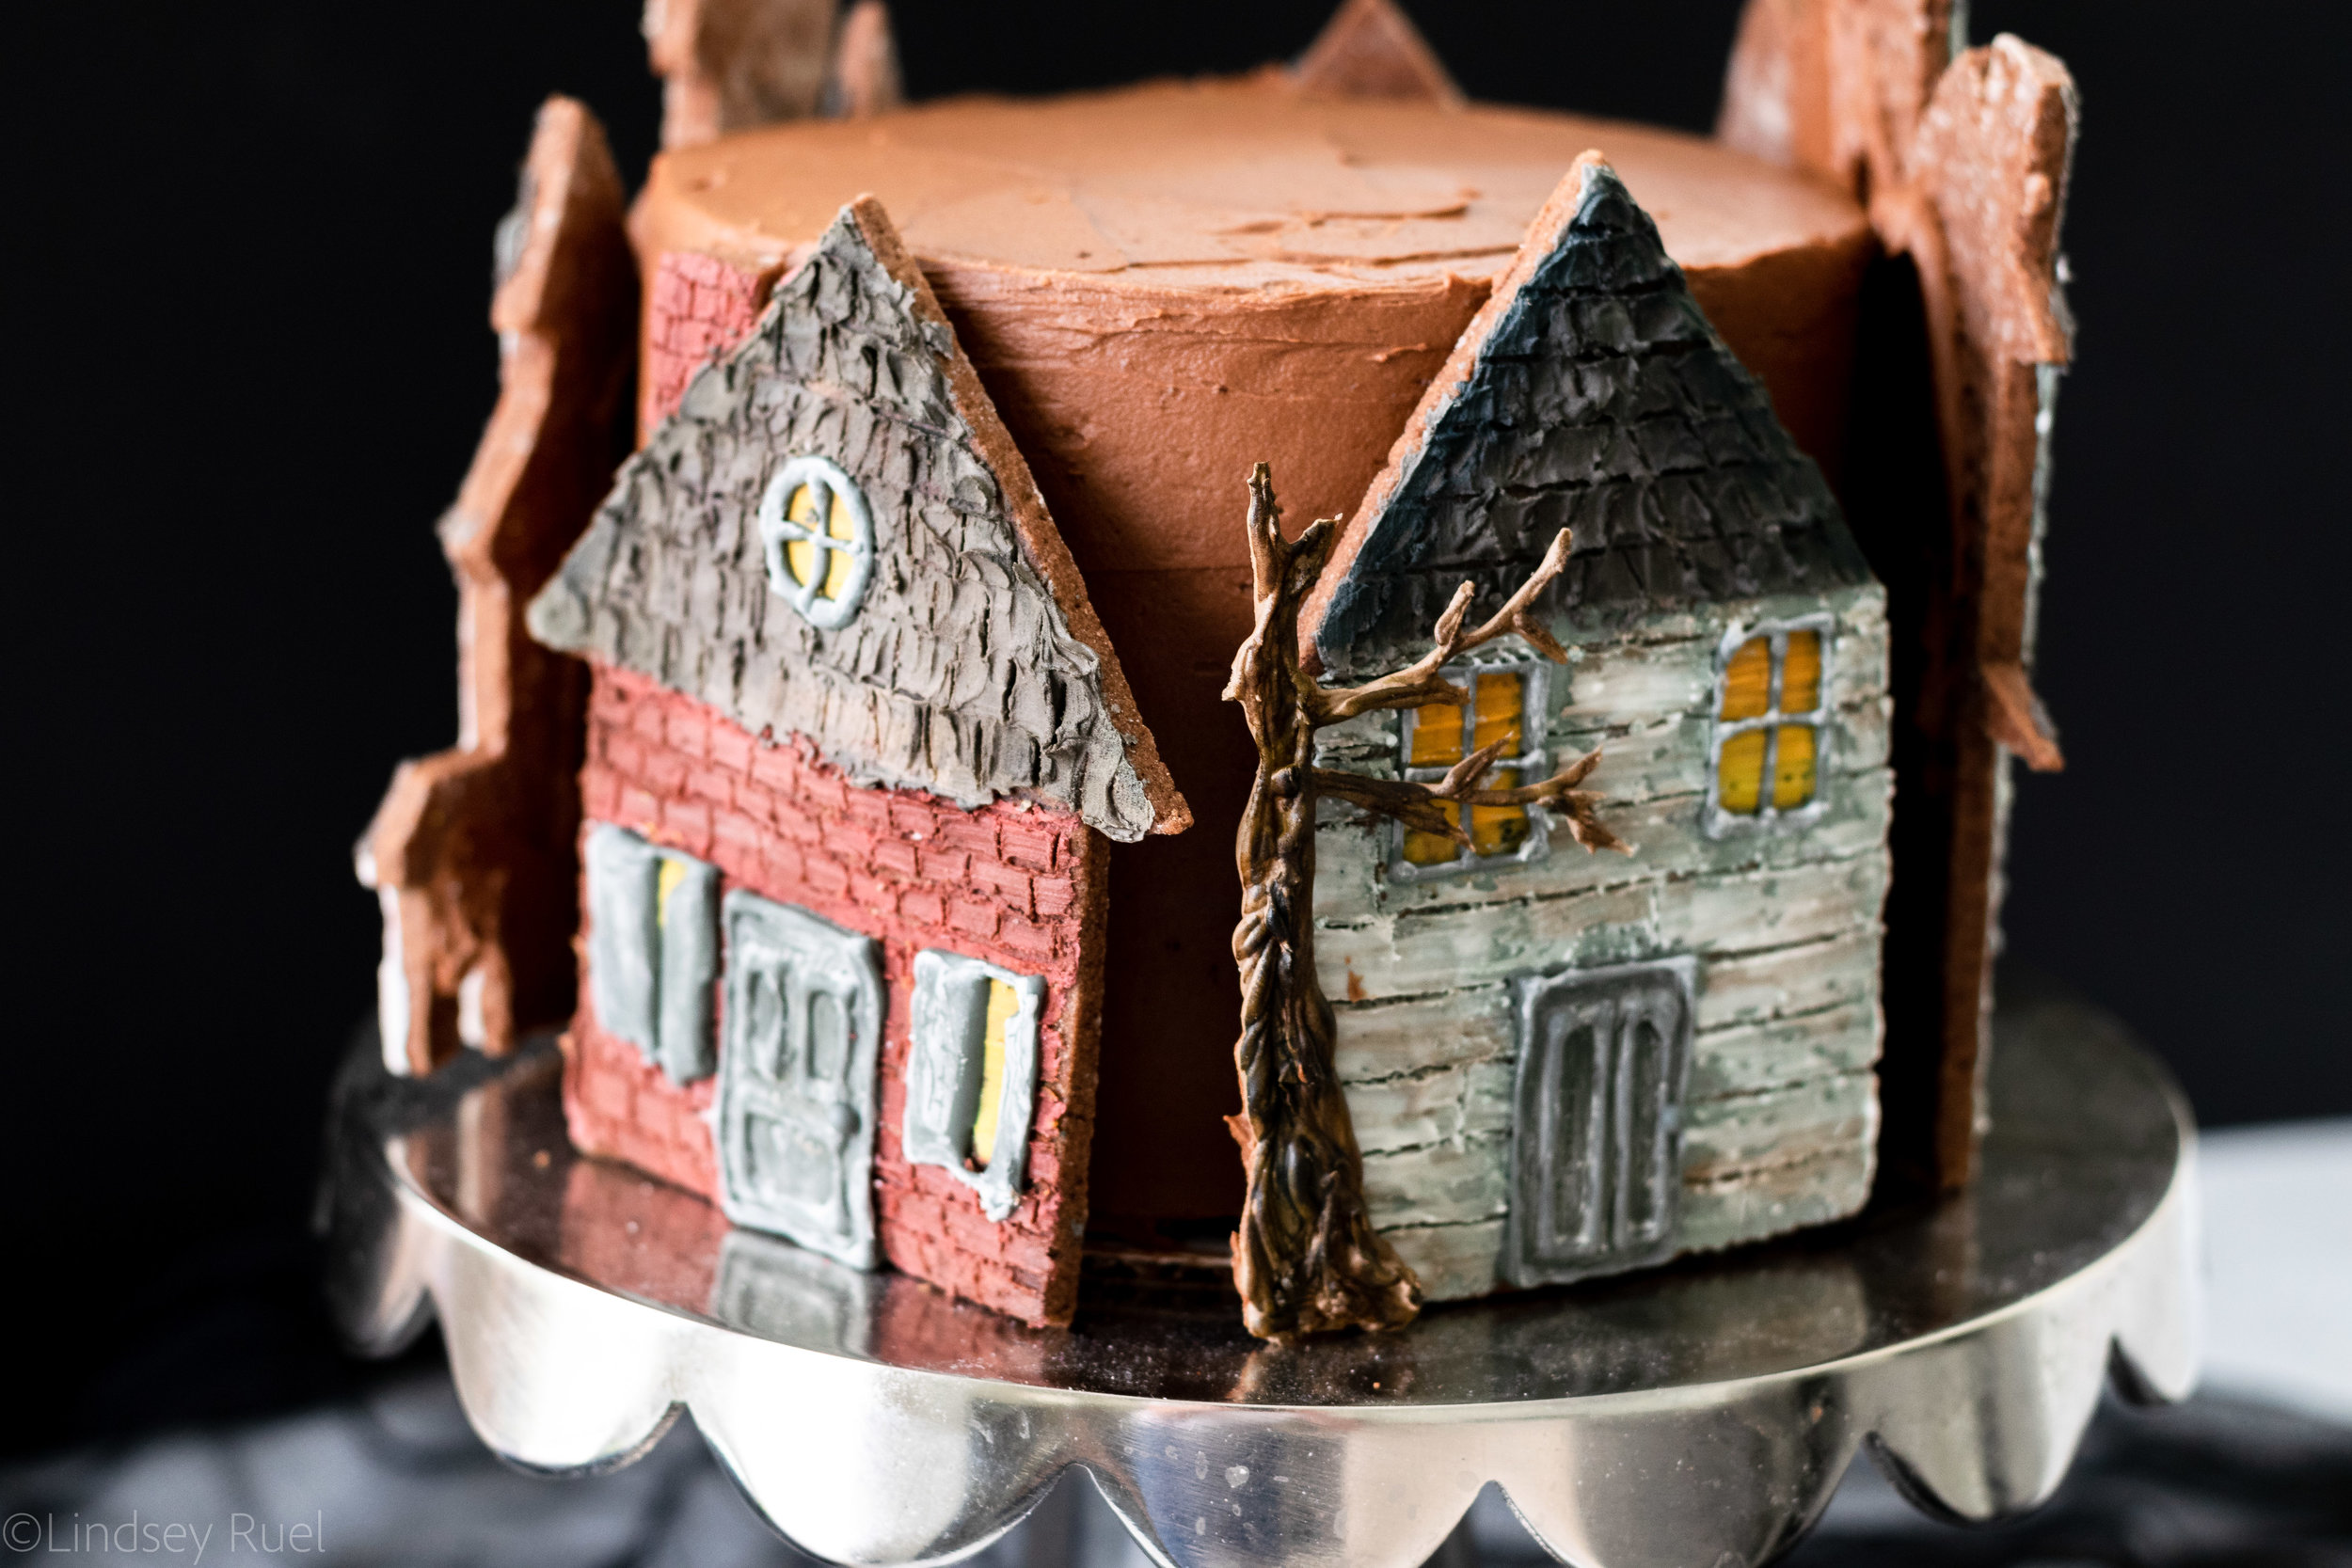
Taking it from just haunted house cookies to a haunted house village cake is actually pretty easy! All the hard work has already been done!
What you Need
To make this haunted house village cake, you will need a couple basic things:
2-4 layers of your favorite cake (I made 2 6” layers of chocolate cake)
A batch of buttercream frosting, preferable dark colored, like chocolate
An offset spatula and/or a bench scraper
And, of course, some haunted house cookies
How to Make It
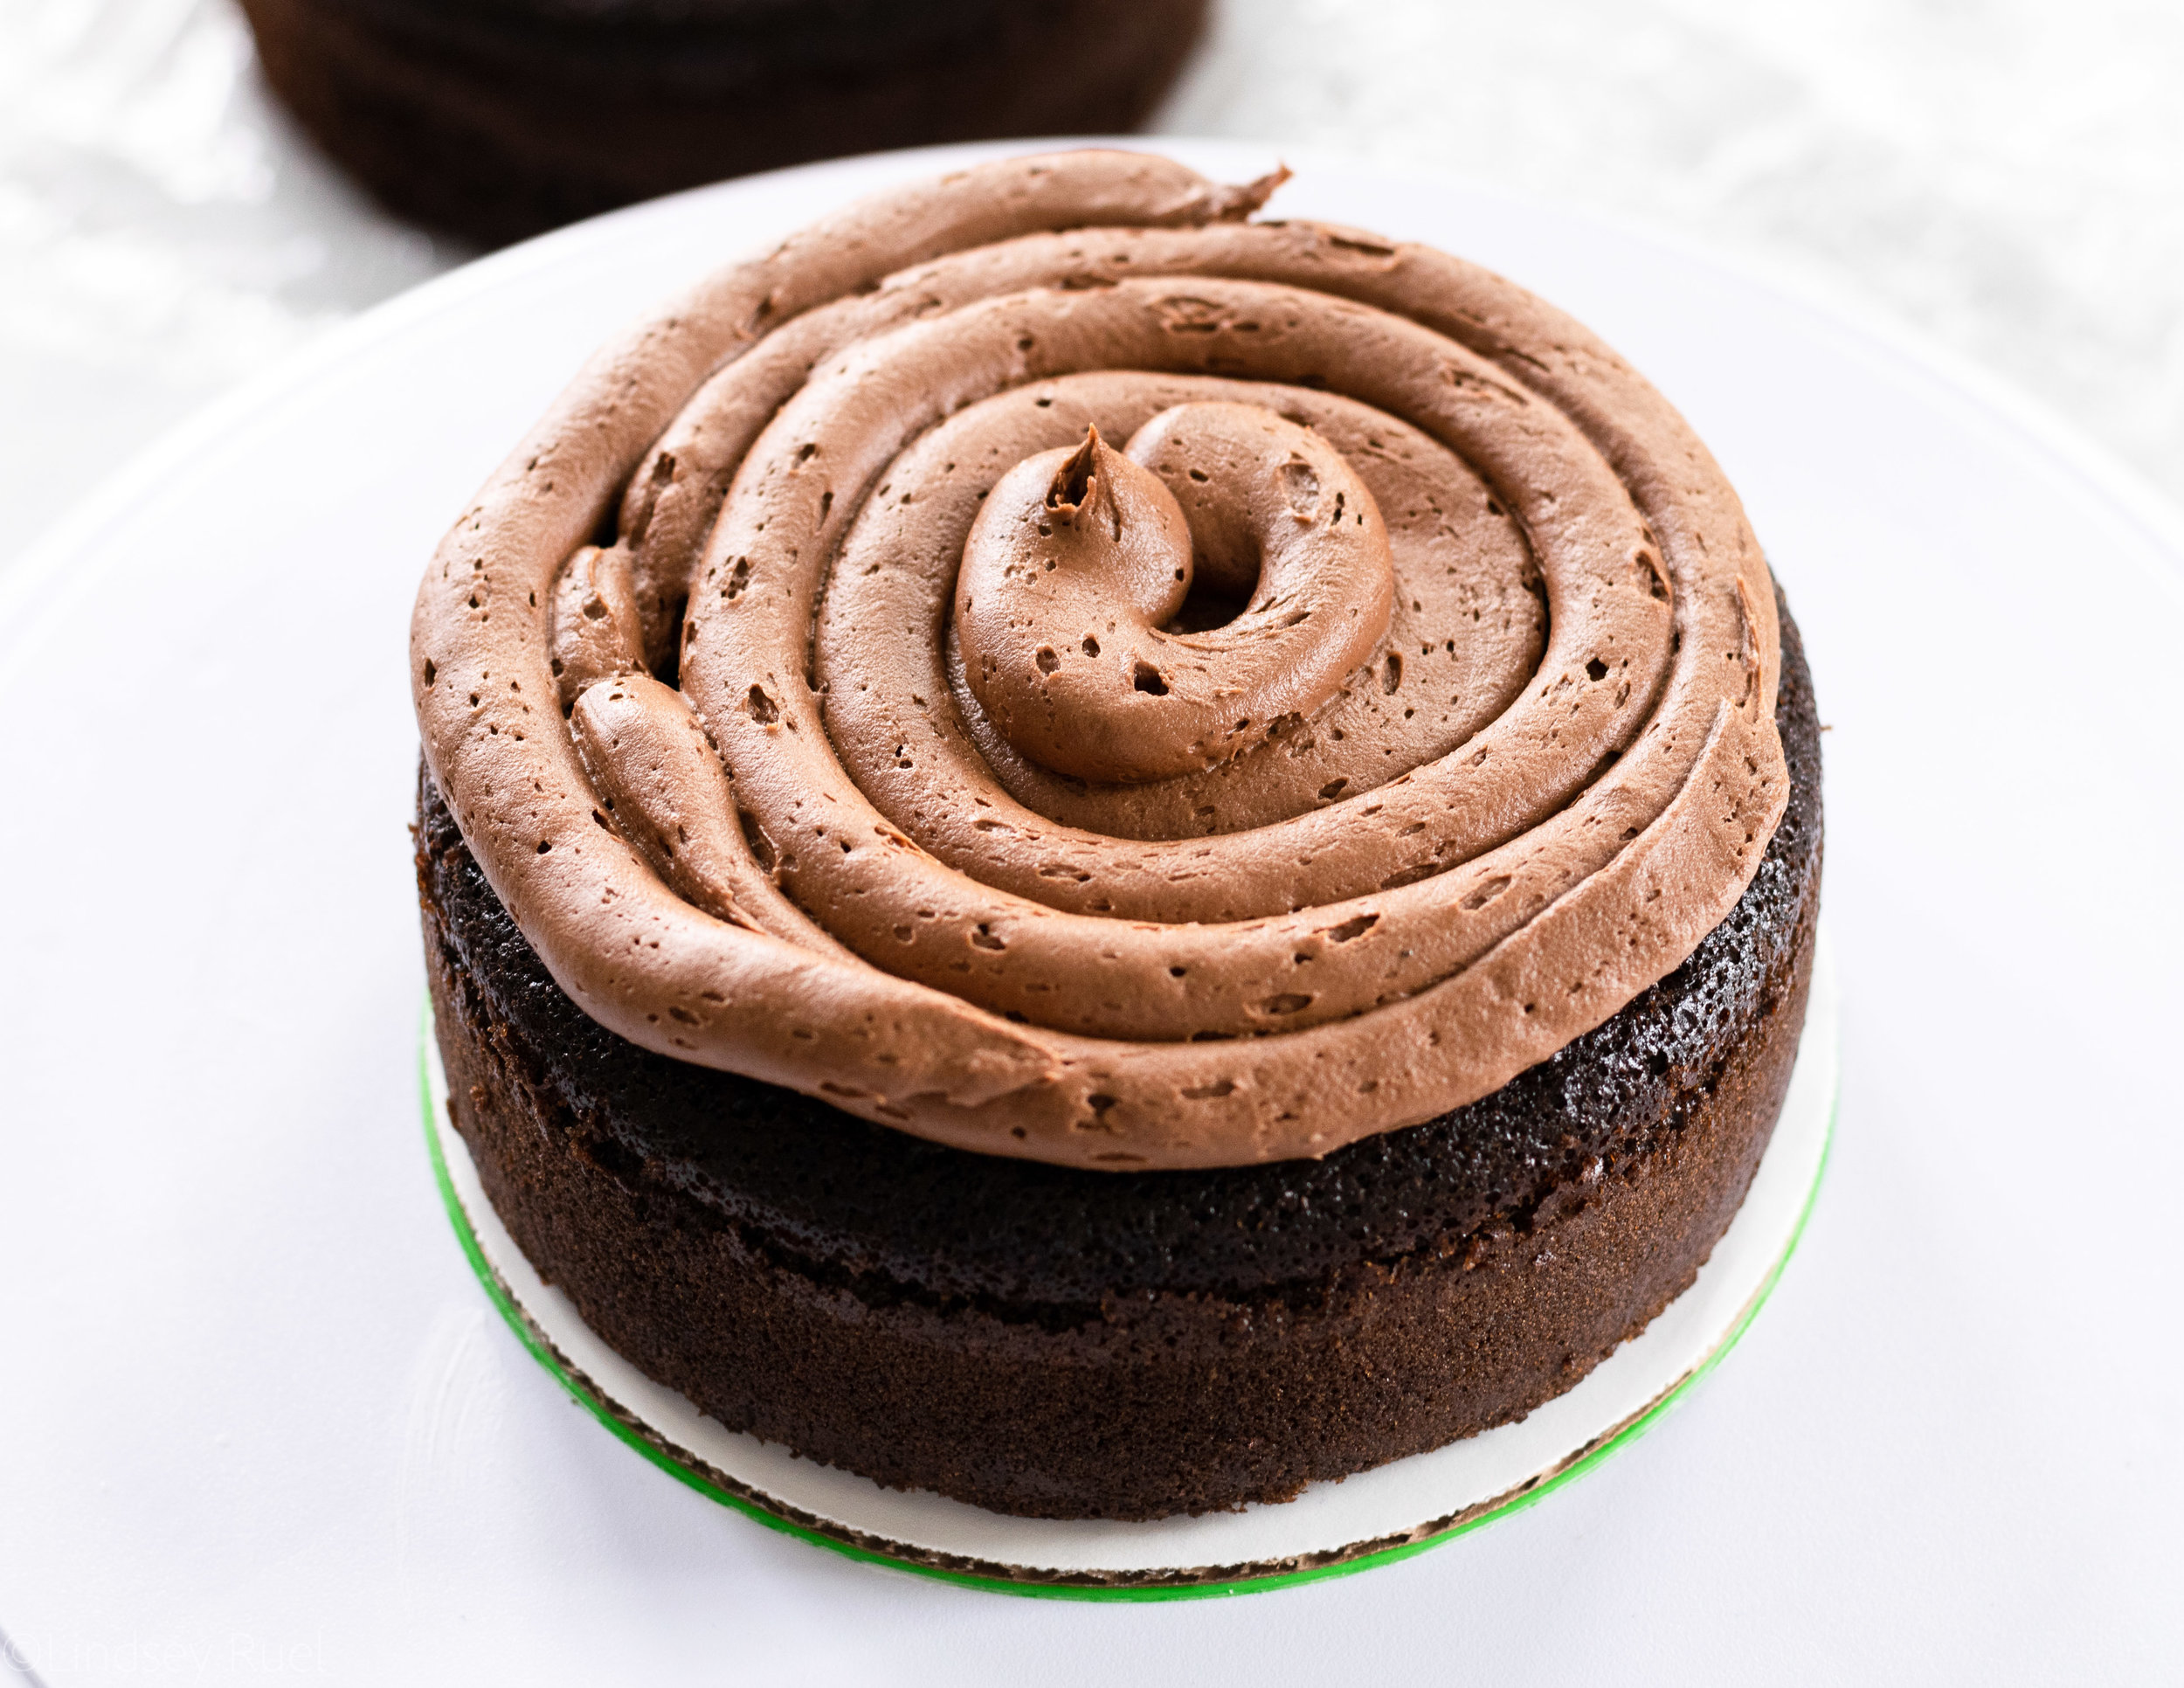
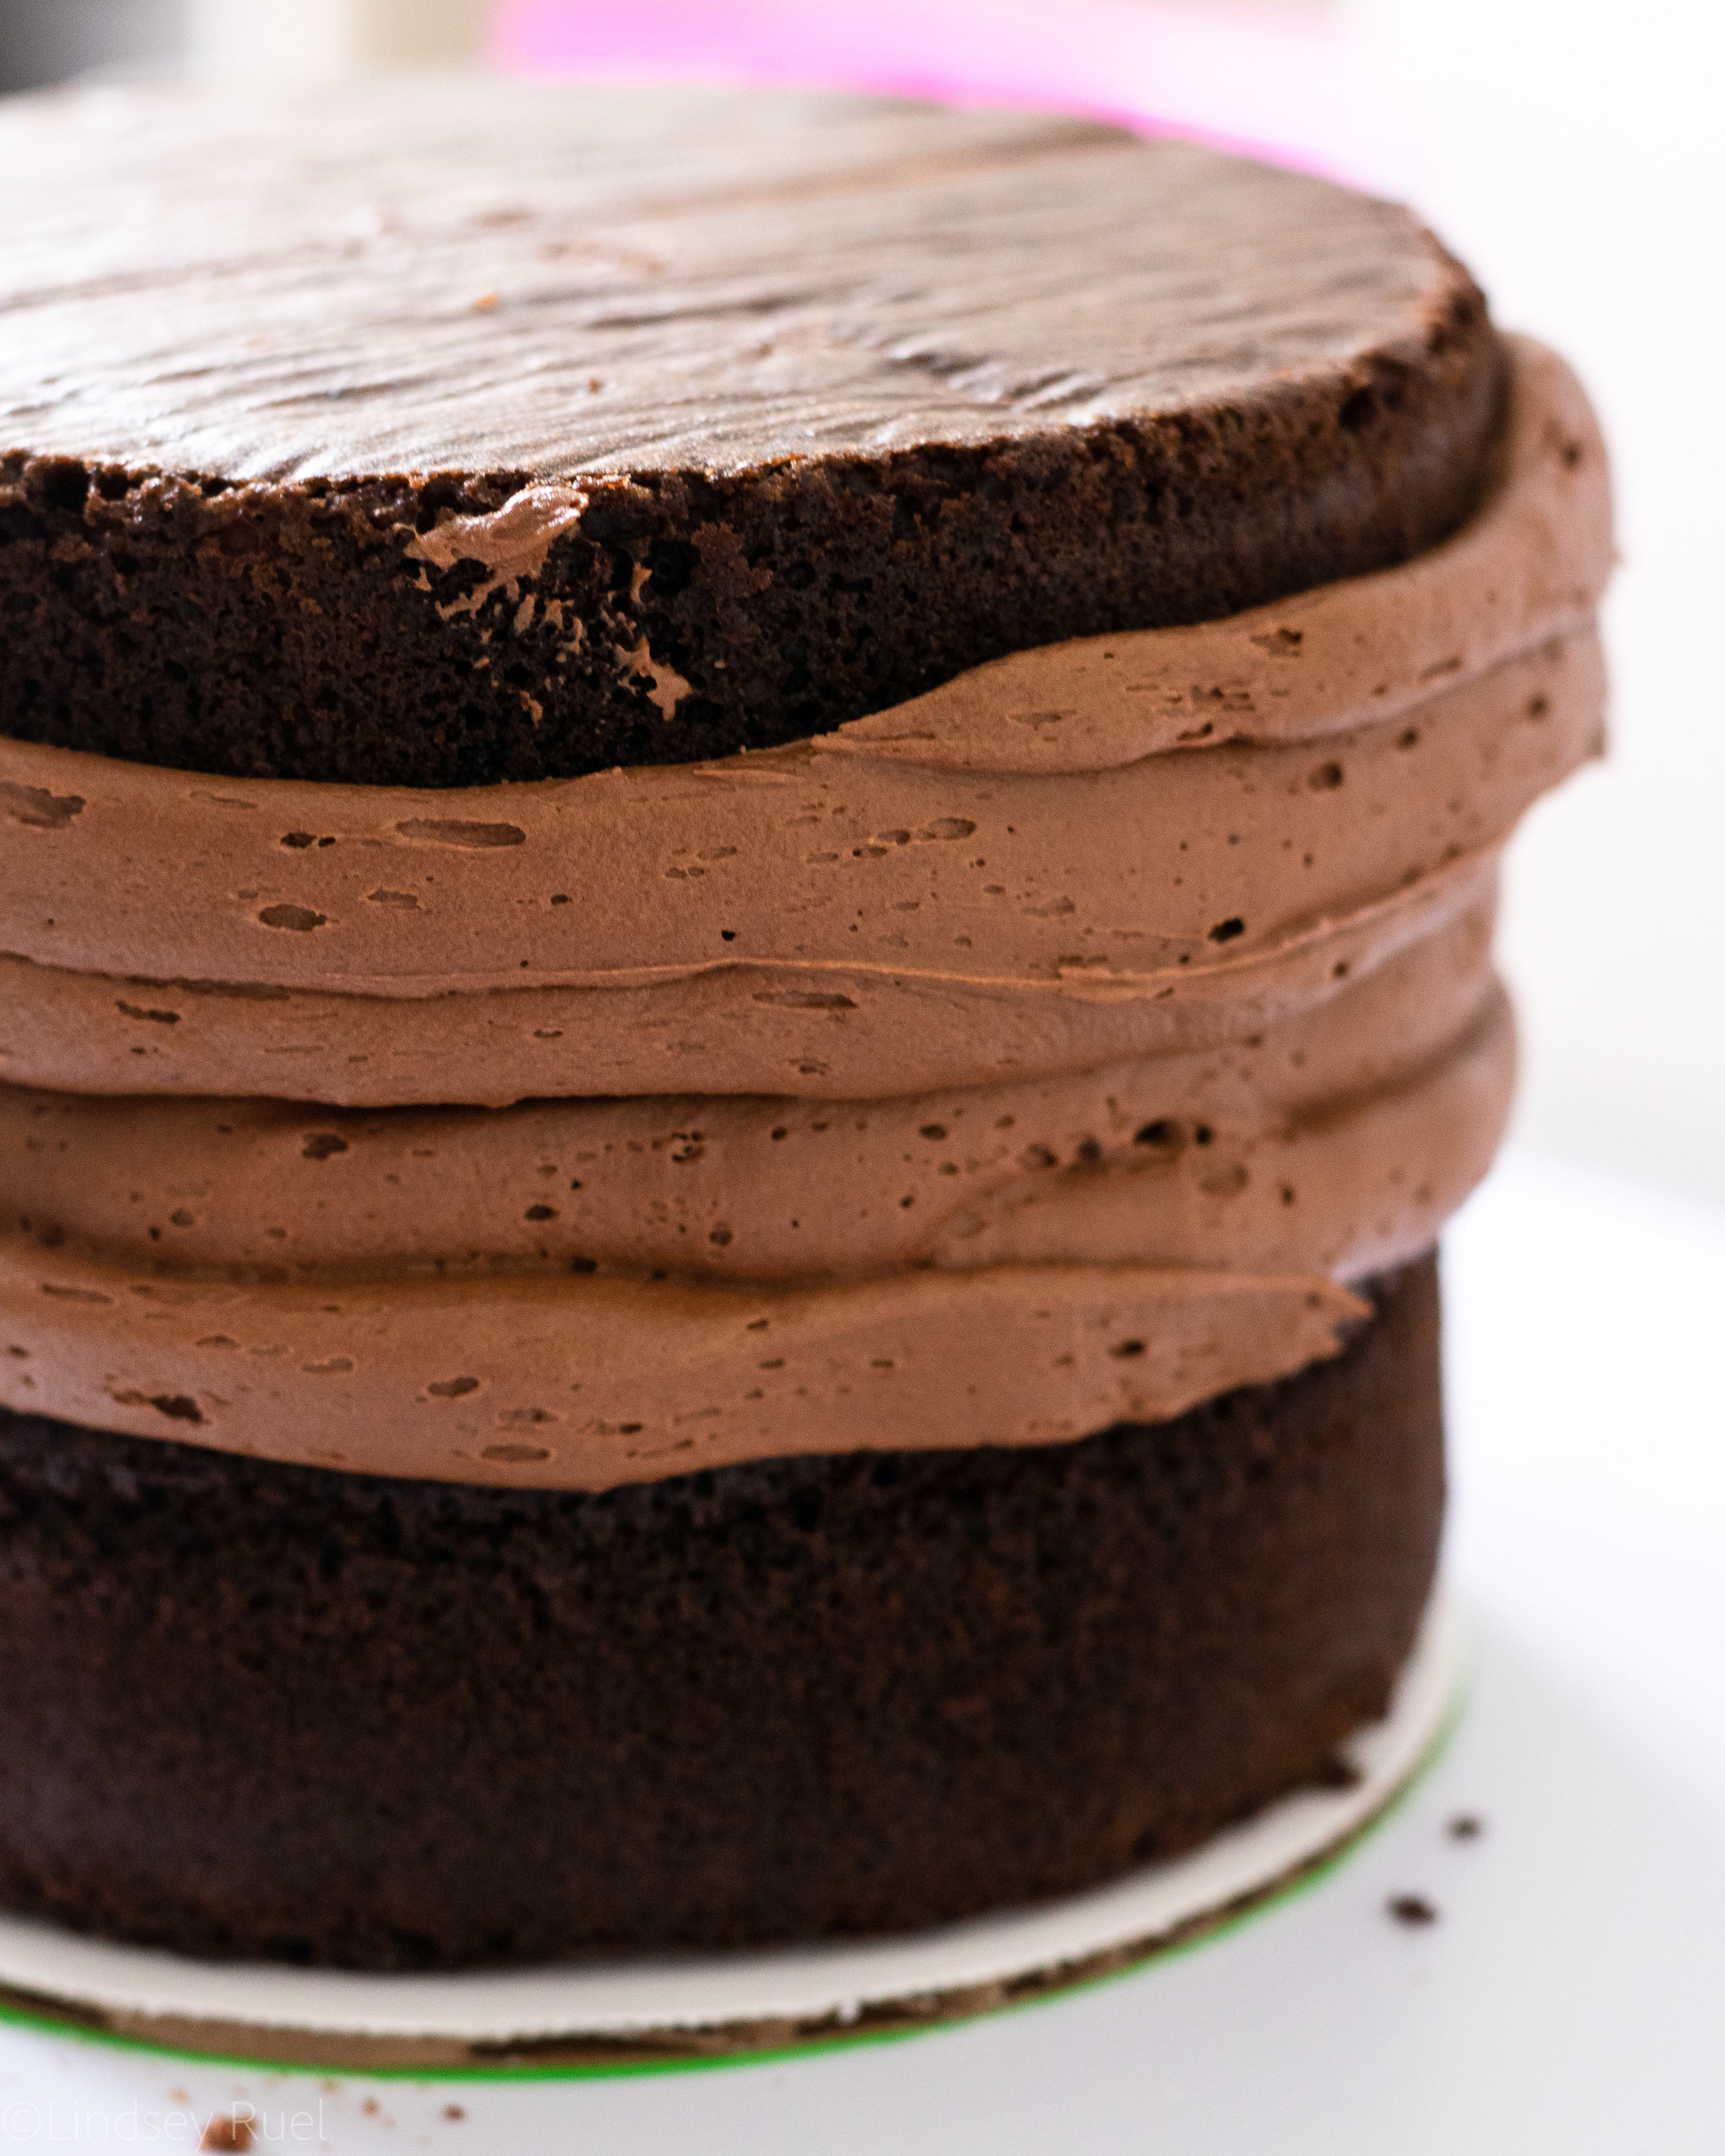
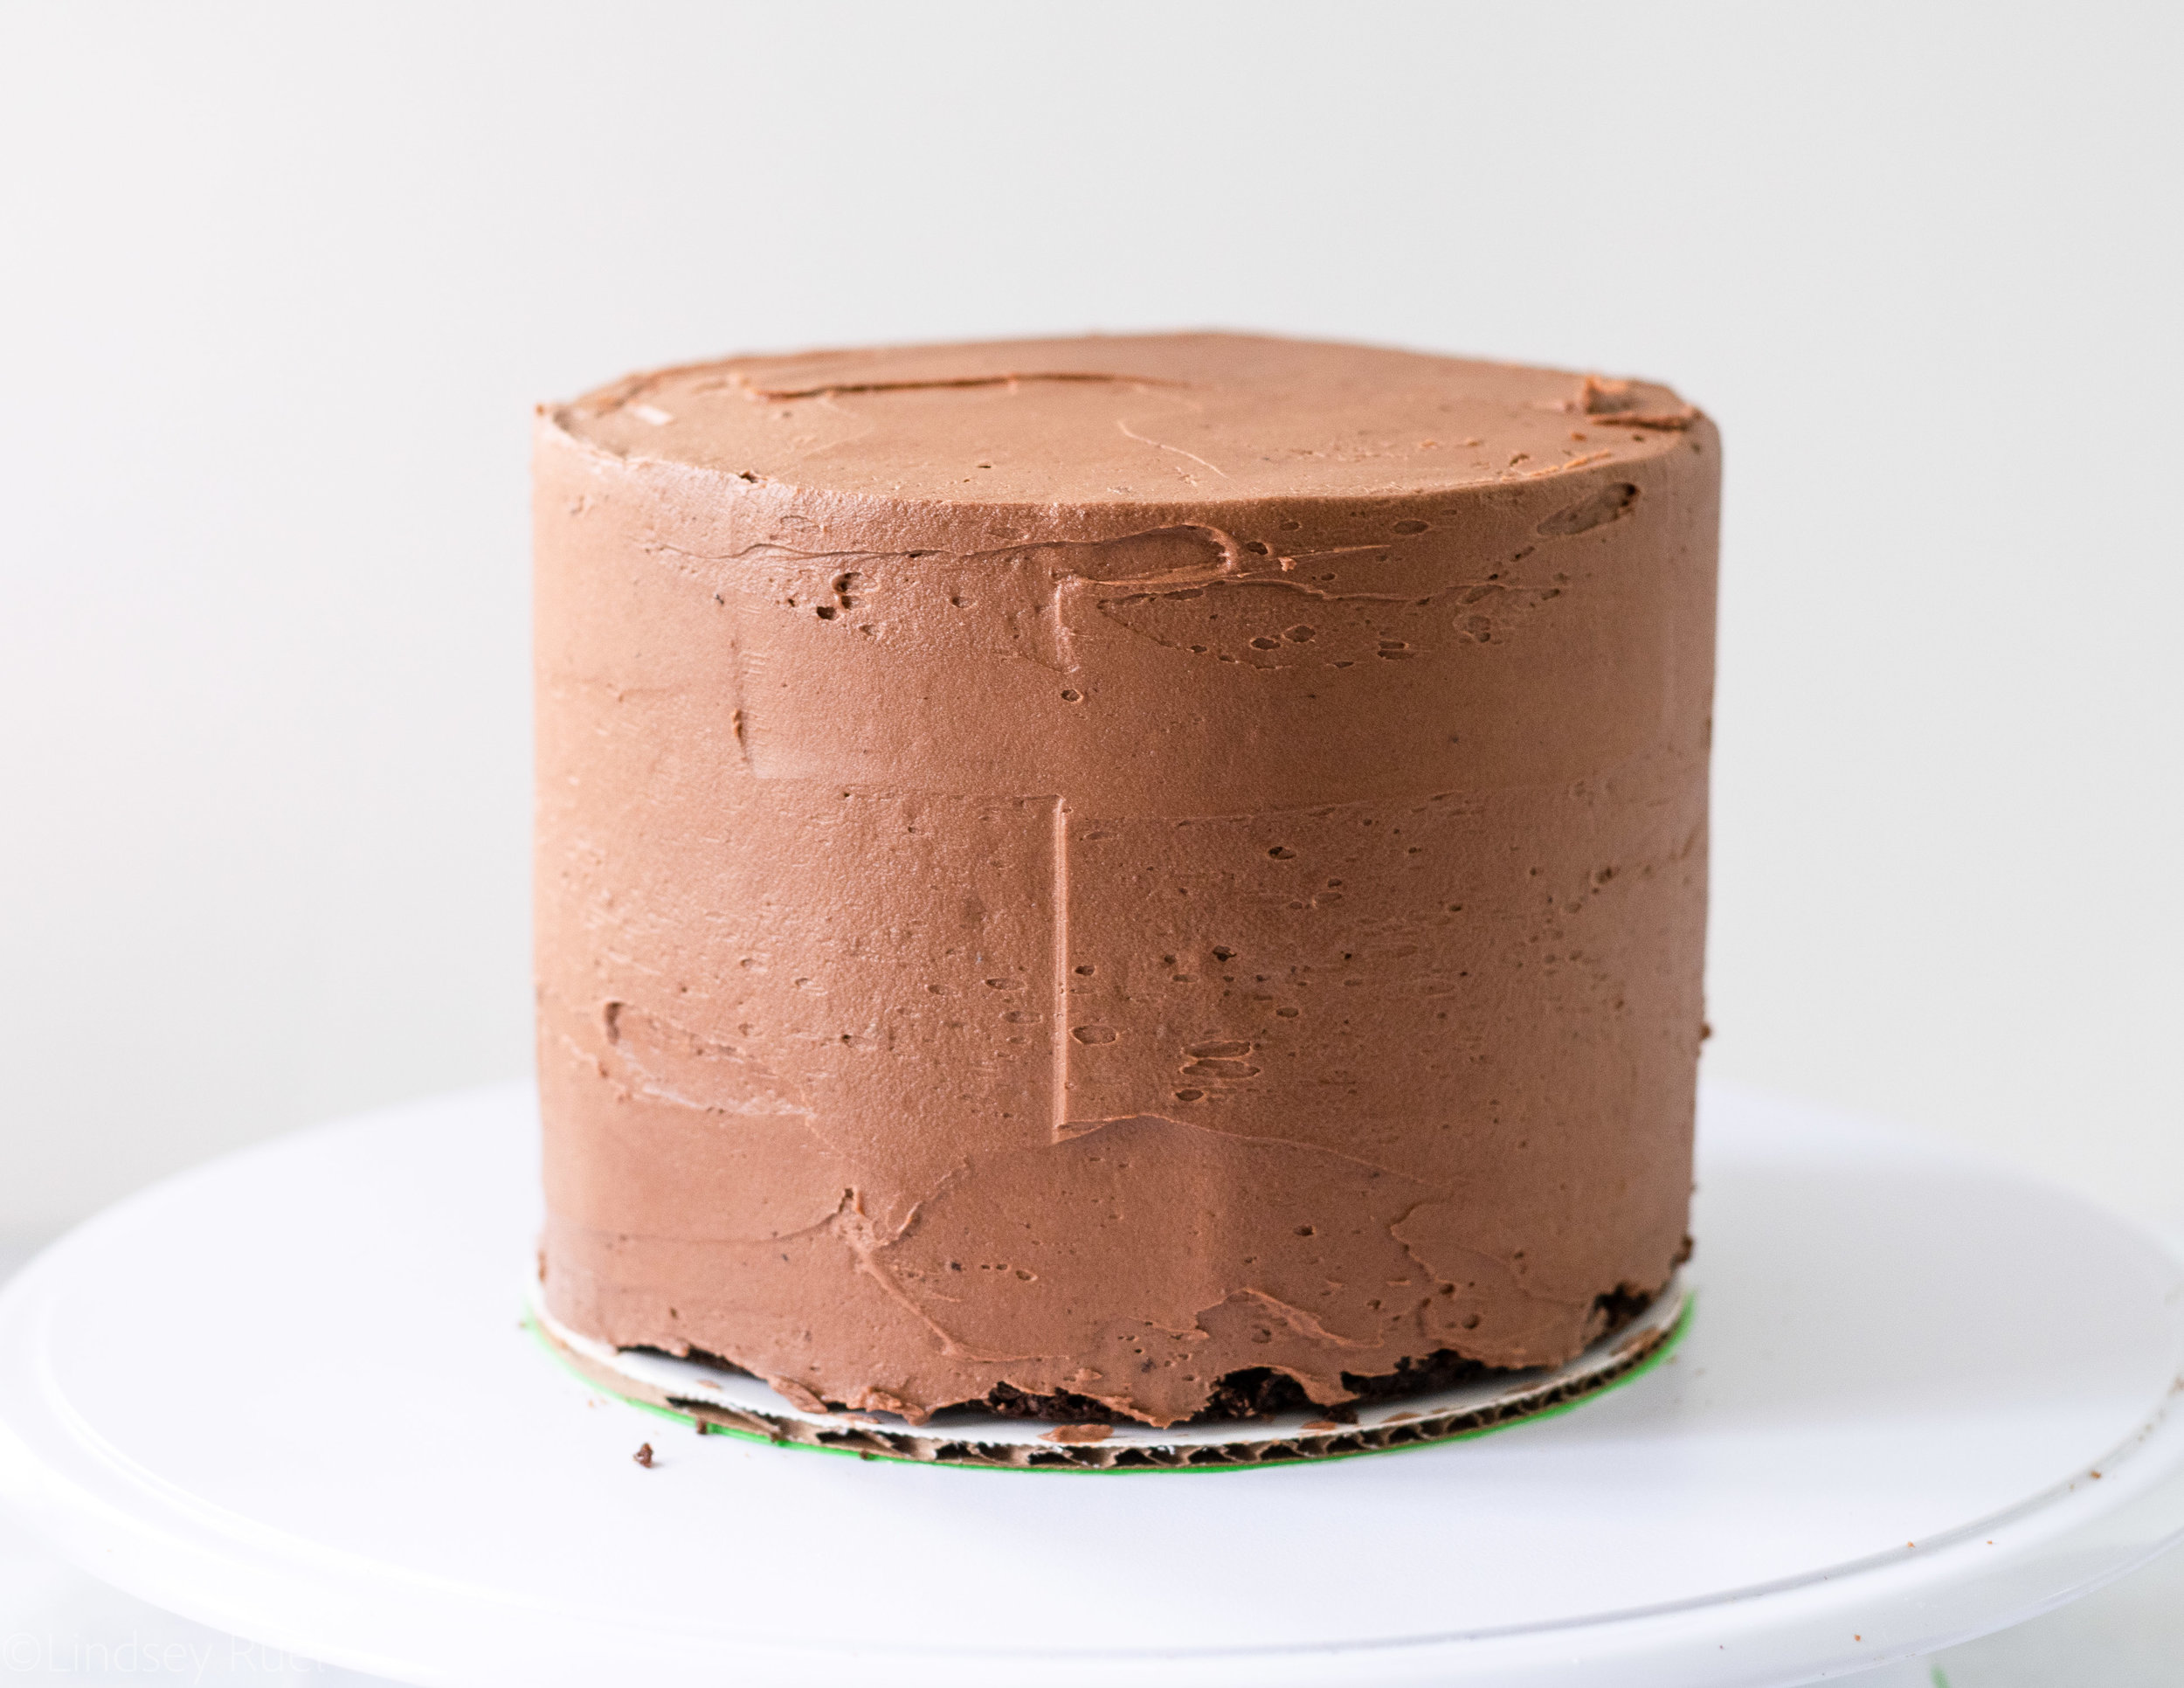
First, spread or pipe the frosting on top of one layer of cake and place the second layer on top. Repeat with all the layers of your cake.
Then pipe or spread frosting around the sides of the cake, starting with the space between each layer.
Use an offset spatula and/or bench scraper to spread the frosting out until smooth.
Because this cake will be covered up by the cookies, you do not need to be as concerned with the icing being perfect. It’s okay if there are a few crumbs or some bumps in the frosting.
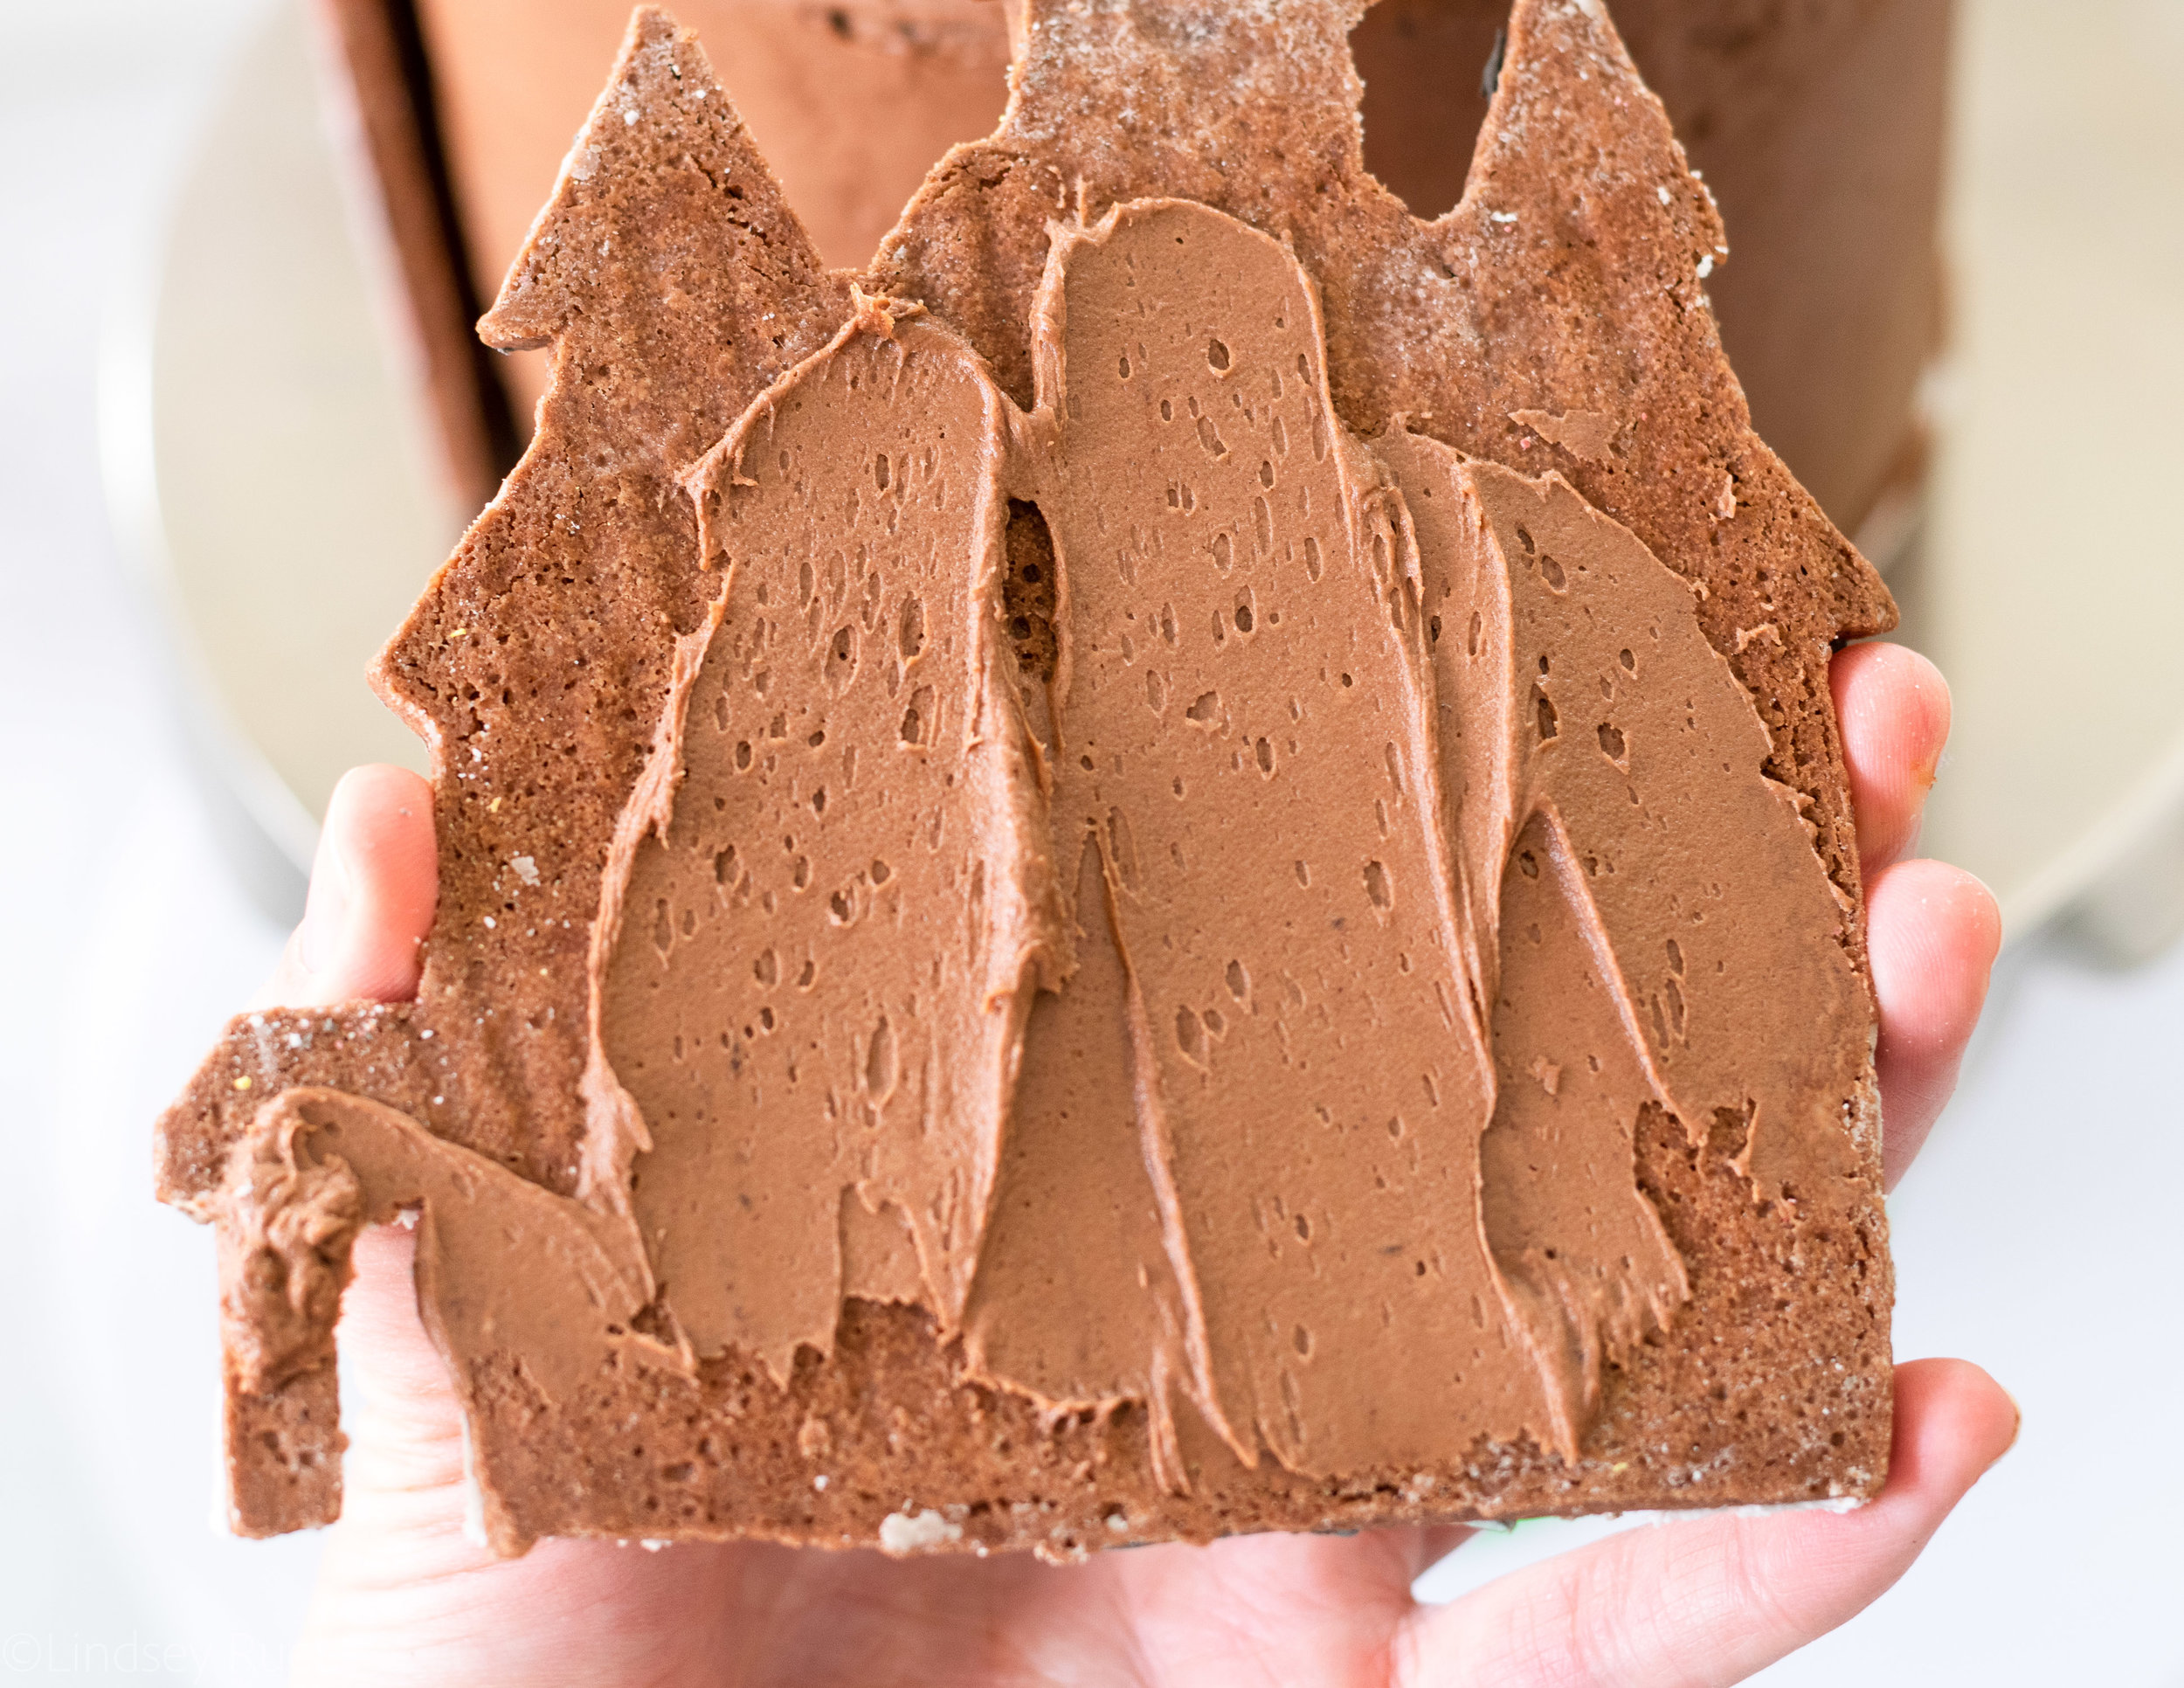
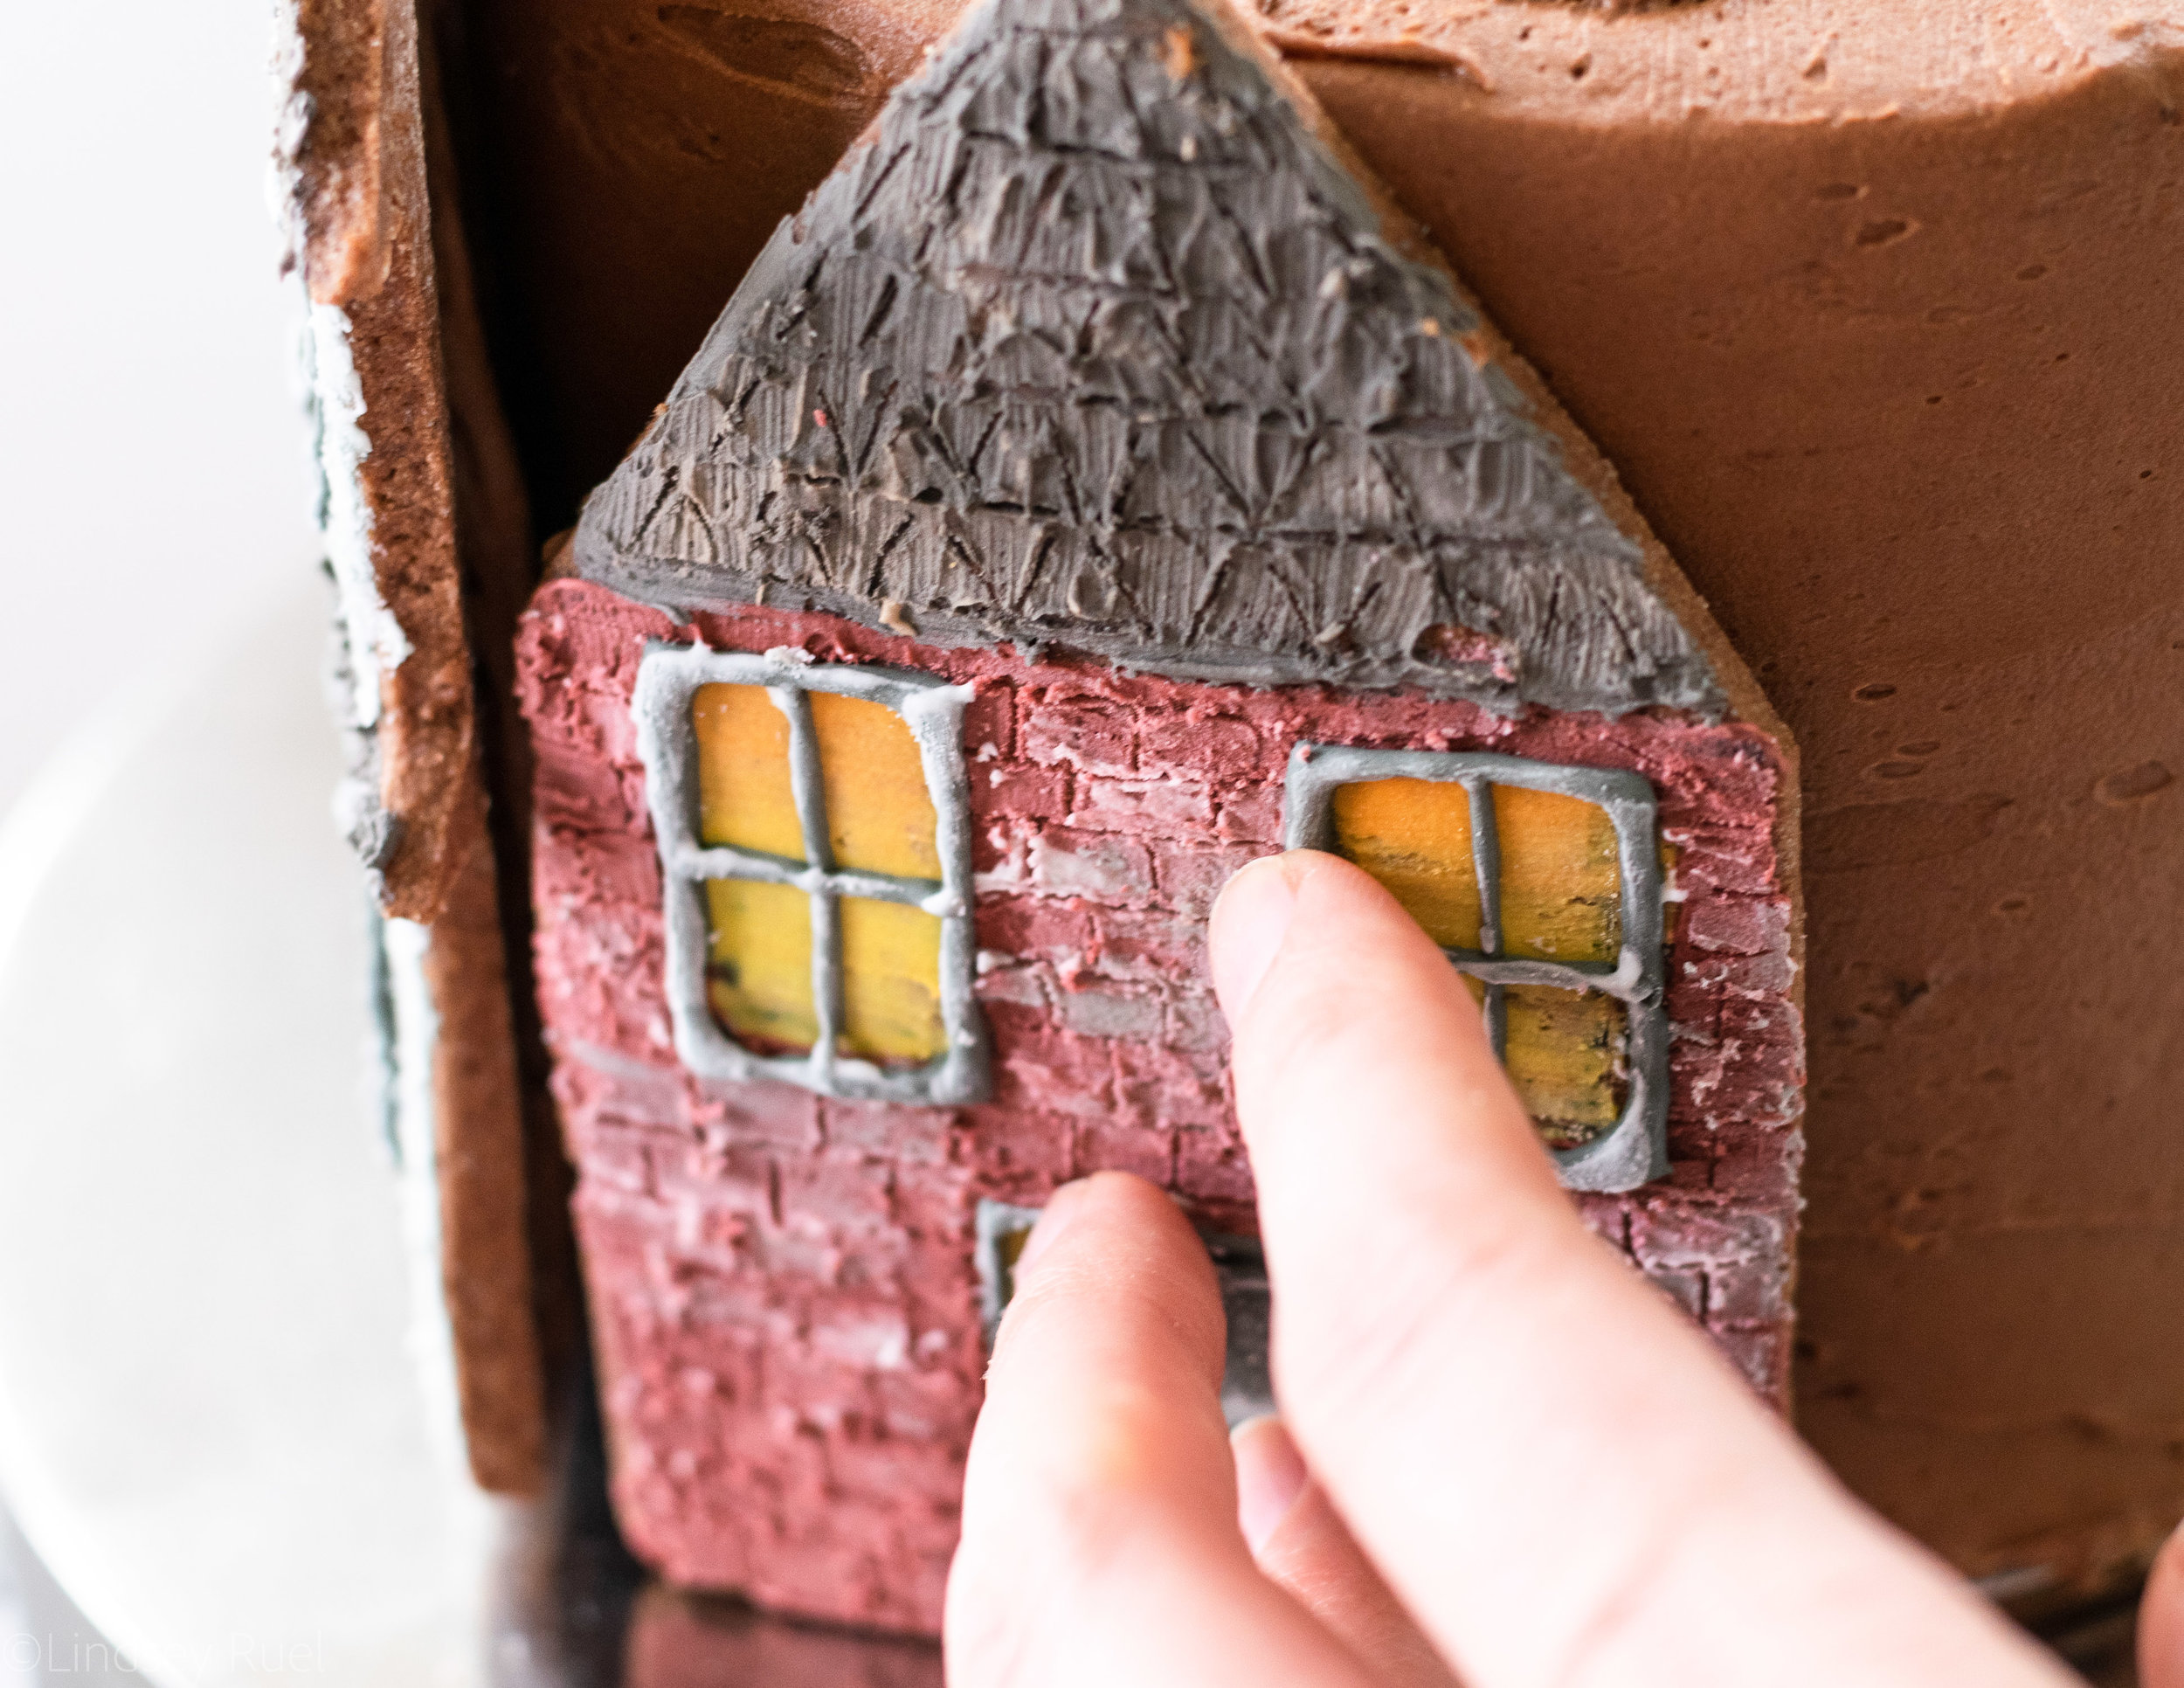
Next, spread a bit of the frosting along the back of the cookie and press it into the sides of the cake.
Since the cookies are flat and the cake is round, the cookies won’t sit totally flush on the sides, so concentrate the frosting towards the middle of the cookie.

From here, you can add another other decoration you like!
I made some spooky trees out of left over royal icing that I “glued” to the sides of some of the houses with a bit of frosting.
You could also add some ghost or pumpkin candies. Really anything you like!
But I kind of like it relatively plain and simple. It really amps up the creepy factor!